

When it comes to photo editing and photoshop, Adobe products are at the top of the list. Adobe Lightroom is a powerful photo editing app that can be used by both beginners and professionals.
With its extensive features, it can be complicated to get used to. Knowing where to go and what to edit is essential to get the most out of Lightroom.
Keep reading to find out how to use the power of the Adobe Lightroom app to create stunning images.
- About Adobe Lightroom
- Extensive Features to Improve Your Photos
- White Balance
- Selective Editing
- Perspective, Crop, and Rotate
- Presets
- Using Presets, White Balance, and Crop
About Adobe Lightroom
Adobe Lightroom is a photo editing app owned and developed by Adobe Inc. Unlike Photoshop where the original picture is lost and there are many manipulations, Lightroom enhances images to give a better result. A plus is that the edited image is saved as a separate file.
Adobe Lightroom can be used on Windows, macOS, iOS, and Android. It includes a range of editing tools that make image enhancement as great as possible. The mobile apps are excellent for editing on the go.
With over 100 million installs on the Google Play Store alone, the Adobe Lightroom app has become very versatile in its use by both professional and amateur photo editors.
It offers a free version and a premium version where users can unlock more cool tools to beautify an image.
How to Download the App
Go to the Google Play Store or the Apple App Store and search “Adobe Lightroom.” Select the app from the search results to be redirected to the installation page. Once there, click ‘Install’ or ‘Get’ to download to your device.
Following that, accept all basic requirements, which include access to your device media library, storage, and more for the app to run successfully. Afterward, the Adobe Lightroom app will be ready to use on your device.
Extensive Features to Improve Your Photos
There are so many editing features on this app, as I have mentioned. Unfortunately, all of those features cannot be discussed in detail in this post, but I'll touch on a number of my favorites and ones which I think can easily make the most impact on your photo editing.
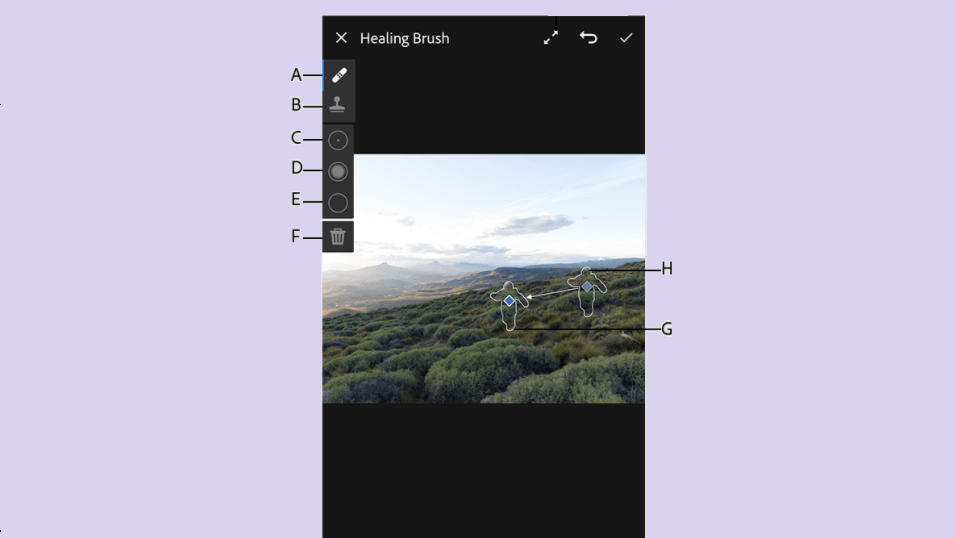
The Healing tool is a magical feature that allows you to remove unwanted content from your image. Have you ever taken the perfect photo, but there was a person in the background or a car parked somewhere? This tool makes it easy to wipe those imperfections away.
The Healing tool allows you to selectively remove the unwanted from your image while smoothing the background around it to make it look like it was never there in the first place!
Tone
The tone feature is aimed to adjust the tonal or light values of an image. I find this very useful when I've taken a photo that had poor lighting or lots of shadows. This feature can also help combat days where the weather is poor and your photo looks dark.
This feature helps you to correct highlights and shadows separately to bring more balance to the image.
White Balance
Most of us might have seen this on different editors before. But what does it mean and what effect does it have on an image?
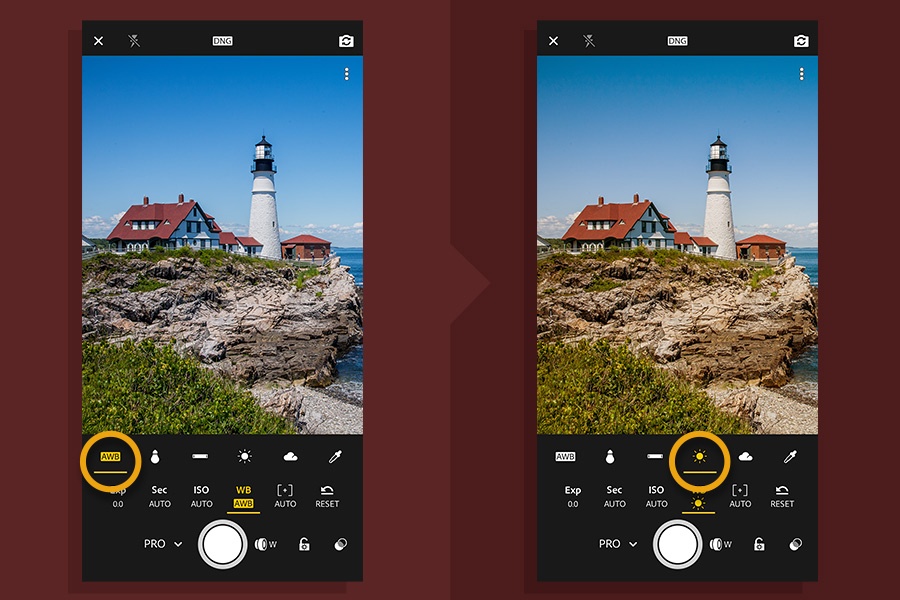
This tool helps to adjust the lighting of an image within the environment. It is similar to the Tone feature but works slightly differently. Here you can correct the various hues, warmth, and temperature of your image.
Remove those wrong color casts that show up and are trying to interrupt your image by adjusting the white balance.
Detail
Detail, as the name goes, is all about increasing the details of an image. It can also be known as sharpening. The Detail feature is to increase the contrast of an image-making it sharper if it was previously dull or to reduce the contrast if it was overpowering.
It affects all aspects of the image and can be pretty useful. Although I might leave this out when I edit images. The reason being that I might need just some aspects of my image to be corrected, not the whole, and I cannot achieve that using this tool.
Selective Editing
The Selective editing tool lets you edit specific areas of an image without disturbing the other filters.
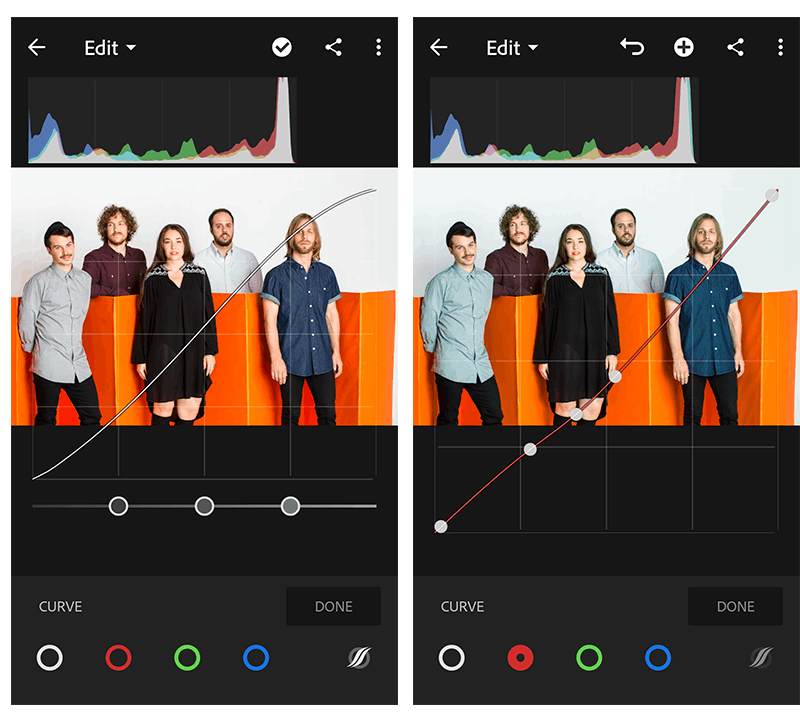
Imagine a calm photograph of a blonde woman on a beach wearing a bikini facing back towards the calm waters.
I might want to highlight the colors of her hair and the blue waters leaving other parts of the image in a black and white filter. With the Selective tool, I can enhance and adjust certain parts of the image on their own.
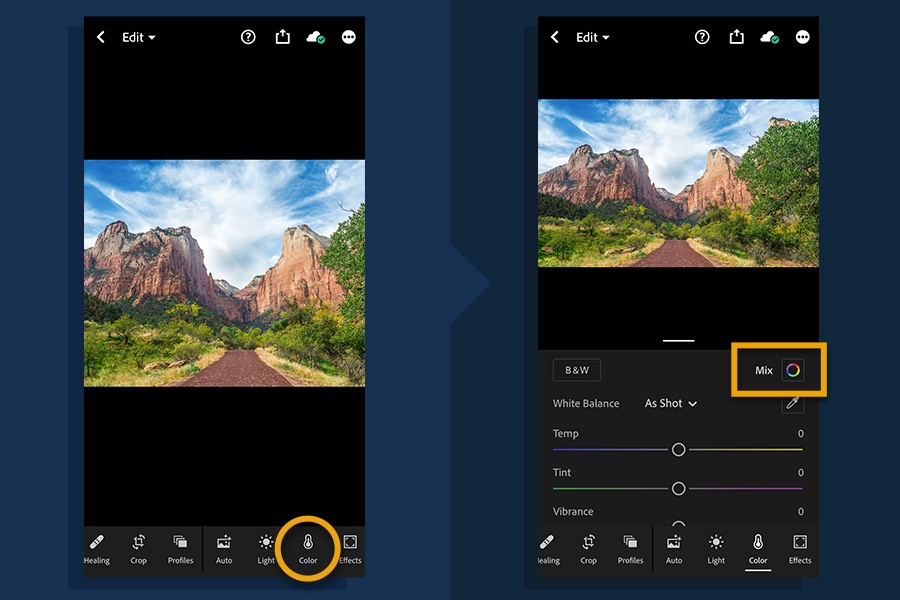
HSL / Color Panel
Colors are always an aspect to play around with. The color panel lets you adjust specific color edits to an image.
What I mean by that is that you can increase, decrease, or tweak the colors of individual items on an image from a color palette. Want to make that cloud dreamier, or to make the sea sparkling blue, or maybe, make the vegetation lighter or darker green?
All this and more can be achieved using the HSL tool.
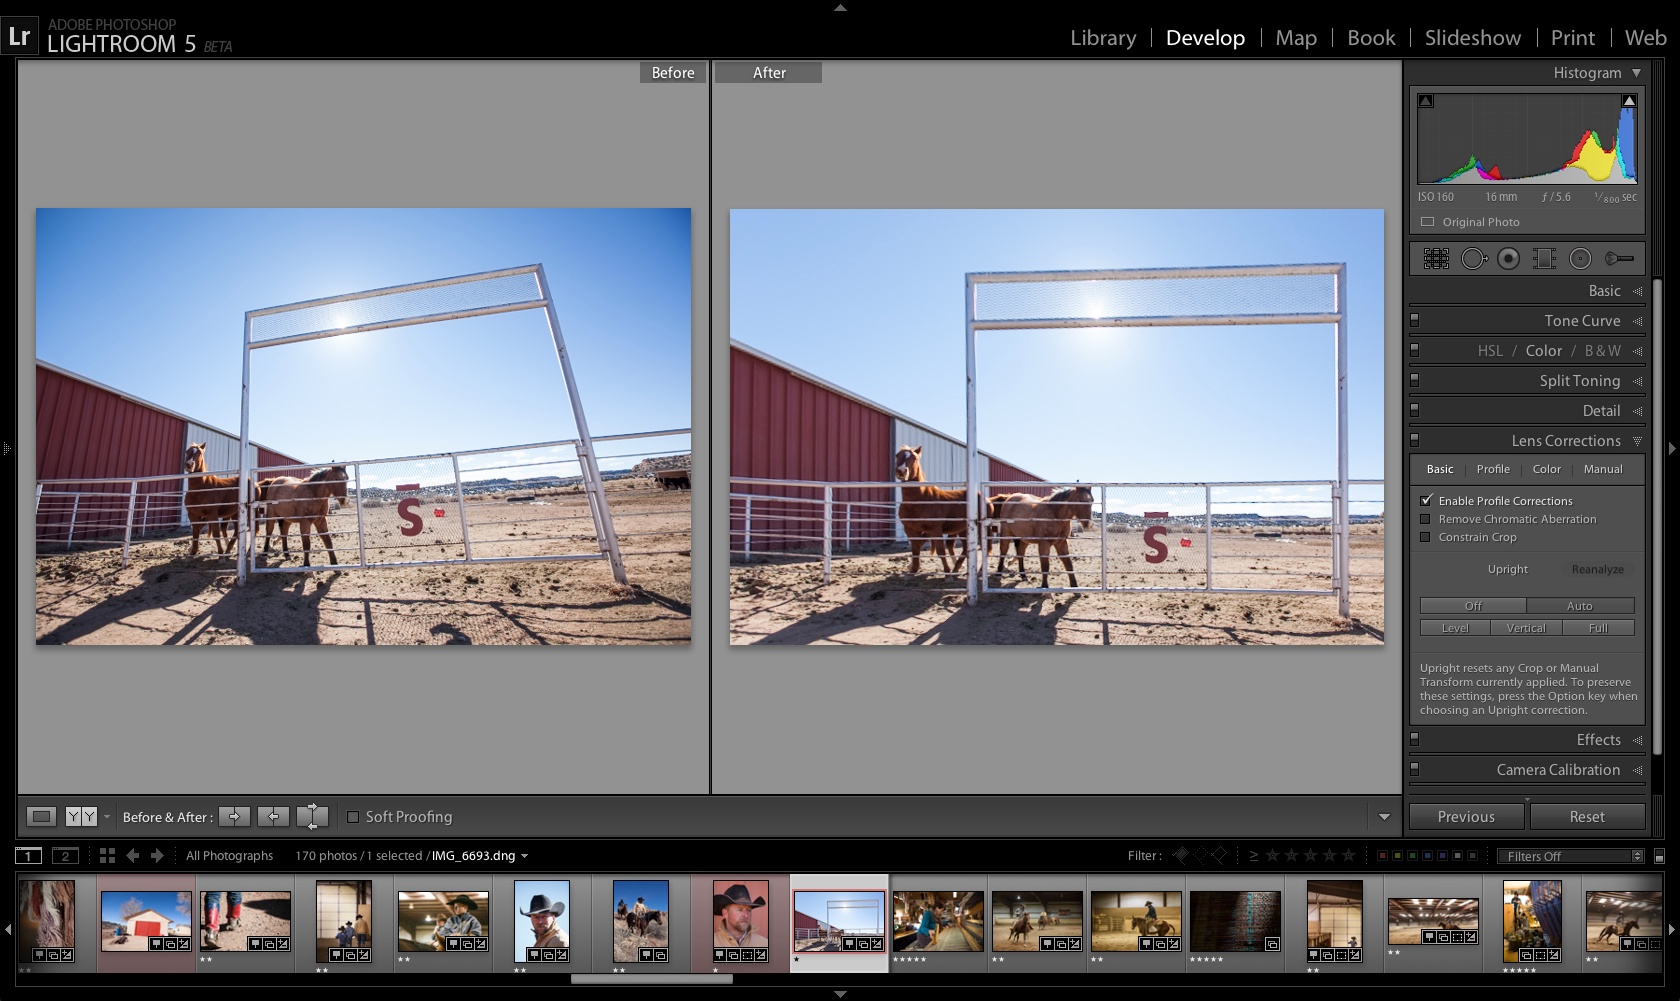
Perspective, Crop, and Rotate
Sometimes, images turn out to have an odd view or angle. They might be too tilted, or just wrong. This tool makes it possible to correct the perspective of an image to your liking.
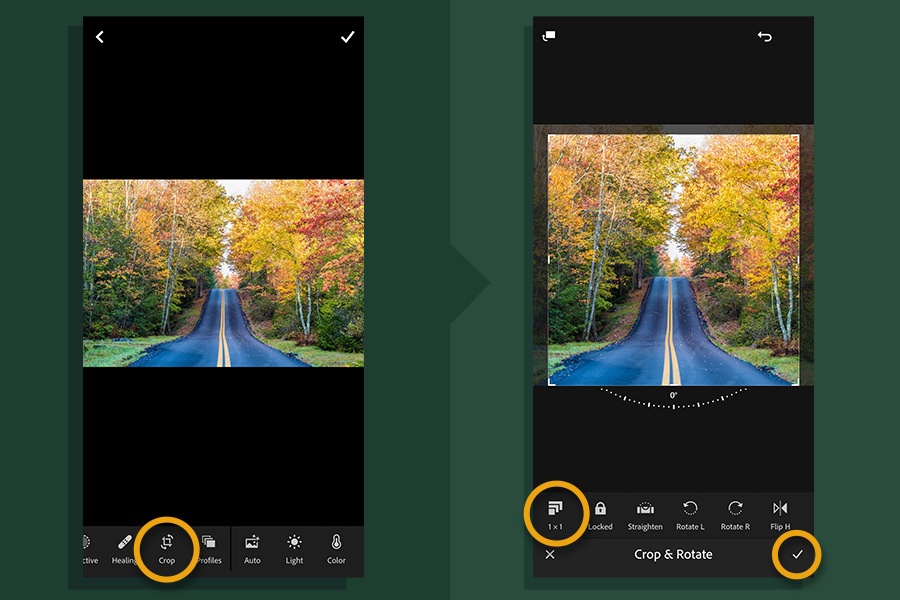
Cutting out part of the background might be required to bring out an image. With the crop tool, you get to achieve this.
Rotating an image is also an option, although it depends on how you want to use it.
I mostly use this tool for adjusting horizontal or vertical line elements in my images, such as a horizon or a tall building, to be perfectly straight if I photographed it at a slight angle.
Professional Camera
Take better photos with the unique phone camera of the app that lets you take even better photos. I find, though, that this still depends on the quality of your mobile device camera. The in-app camera comes with different modes like Automatic, Professional and High Dynamic Range, HDR.
With these tools, you can take awesome pictures that may require less editing.
Presets
Presets are like gold in Adobe Lightroom. They may take a little getting used to, but when understood and done right they will save you a lot of time when using the app.
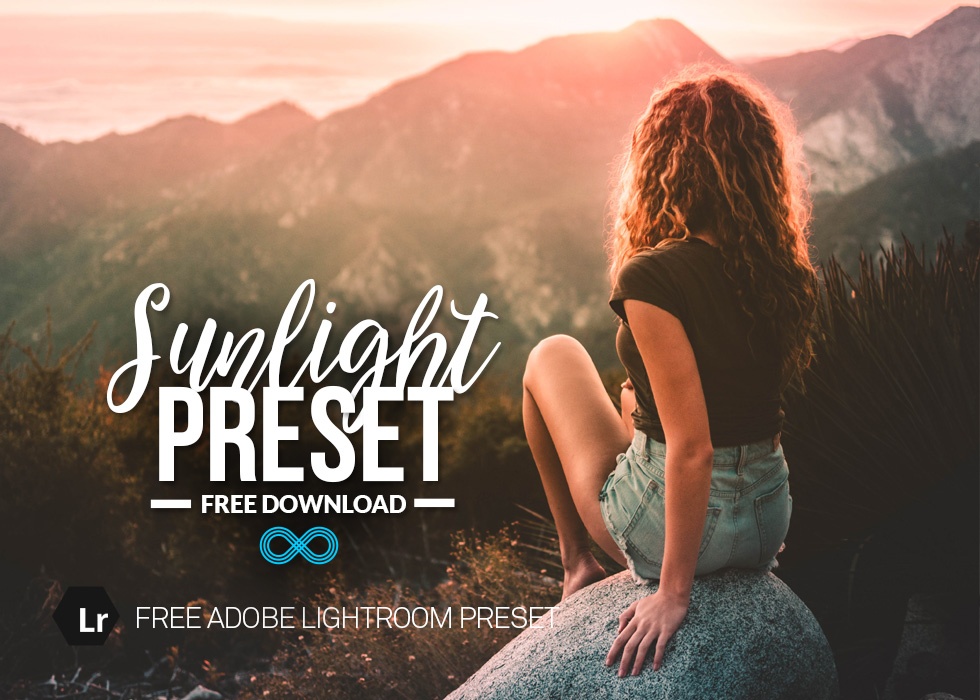
Presets are like filters that you can customize, import, copy and paste to apply to an image or a range of images. Some are automated filters that are packed with lots of edits already which you can apply to your image with no hassle.
Presets can be a good starting point and you may still want to make a few tweaks to get your photo exactly how you want it.
You can even save your own customized preset so you can pick it up from there when applying the particular preset to another image.
How to Use the App
Welcome to the highlight of the article. How to best use the Adobe Lightroom app usually requires tutorials. I will do my best to share the basics and get you ready to start crafting excellent images on the app.
Start by importing the image you want to edit into the app. Click “File,” which opens your media library, then select the image you want to edit. Lots of basic editing tools can be found in the Edit Section.
After selecting an image or taking an image using Adobe Lightroom camera, a list of options displays below for editing.
Using Presets, White Balance, and Crop
Next, you can choose filters like High Contrast, Vivid, Punchy Detail, and so much more. You choose filters by selecting the Preset tab at the top bottom row.
Then, you scroll upwards or downwards through the list of filters and view the preview instantly when you click on any preset/filter. The White Balance tool can also be found in the list below. Select by clicking on it, and adjust by increasing or decreasing the bar of intensity.
In the crop feature, you can rotate, balance, and flip an image. Click on this editing tool, and watch the preview as you reduce the background, balance, or rotate an image.
Undo Feature and Premium Subscriptions
Most basic edits can be achieved directly on the edit pane. Try them out and see how useful they can become in transforming your image. Remember to use the “Undo” tool if necessary instead of starting over all edits you might have carried out.
That can be easily found as a backward arrow at the top right corner of your screen, or as “Undo” in the Edit pane.
Adobe Lightroom offers free and premium versions. The Premium plan goes for $9.99 per month. Alternatively, you can purchase the Adobe Creative Cloud (CC) which contains all adobe apps for $52.99 a month. The Premium plan gives you access to 1TB of cloud storage and RAW support, among other features.
Conclusion
With lots of photo editing tools and apps in the marketplace, there are so many adjustments you can add to an image to make it stand out. We all know how important an excellent image can be, especially for online marketing and social media use.
Adobe Lightroom brings some intensive editing features to a mobile app that we can use quickly and easily, anywhere.


